
Drill 1 – Juggling – 5 minutes
- Juggle for 5 minutes
- The objective is to keep the ball from falling to the ground using your feet, thighs, shoulders, or head.
- Give the players 5 minutes to see how many touches they can get without the ball falling to the ground.
- Players should remember their high score
- Keep the high score to themselves. In future practices they will try to improve on this high score
Drill 2 – Dribbling – 5 minutes
- Dribble the ball anywhere within the field of play
- Use the entire space
- Do not let players bunch up
- Keep the ball close to you while running
- Can the players run and keep the ball under control
- Players who are walking should be urged to run
- Players who are running too fast should be urged to slow down in order to stay under control
- Every 30 seconds or so, ask players to perform one of 4 moves learned during Week 1, Week 2, or Week 3
Drill 3 – Switch – 5 minutes
- As the players are dribbling, you yell “Switch!”
- Players stop the ball they are dribbling dead with the bottom of their foot
- Players then go find another ball to dribble
- They cannot dribble the ball they just stopped
- Once they find a ball players dribble again until you yell “Switch!” again
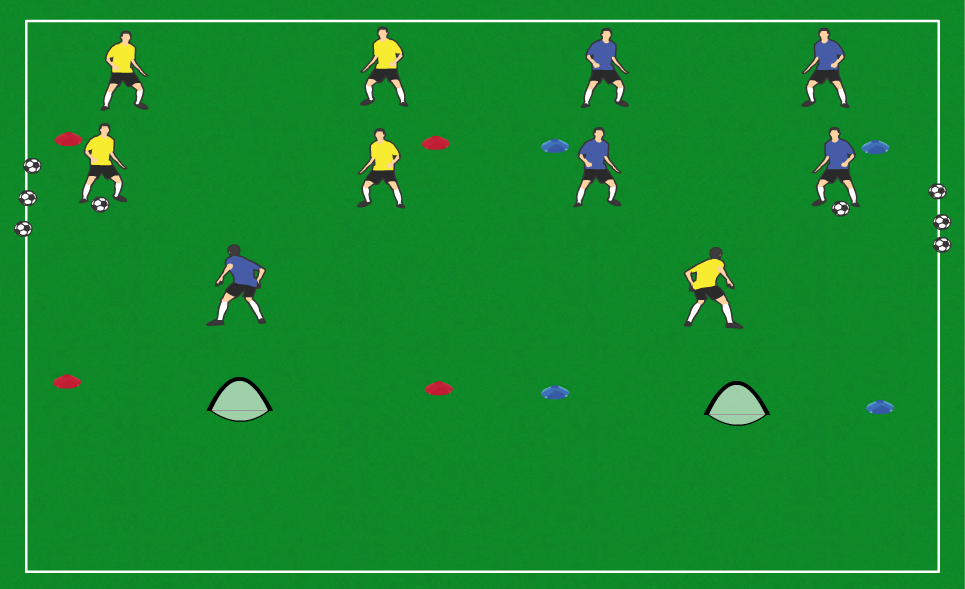
Game 1 – 1-on-1 – 10 minutes with reminding players of basic defense
TEACH VERY BASIC DEFENSIVE TECHNIQUE
- Bend at the knees and lean forward to find a low center of gravity
- Keep moving your feet
- Don’t “dive-in”
- Don’t run straight towards the ball because the opponent will just run around you
- Don’t stick your foot out
- Get the whole body behind the tackle
- Stay between the attacker and the goal
- Go for the ball once the attacker takes too heavy of a touch
IF YOU WANT TO DELVE DEEPER INTO DEFENDING, CHECK OUT OUR POSTS ON TEACHING INDIVIDUAL AND TEAM DEFENDING
Setup

- Place a goal on opposing ends of the box you set up for the “Knockout” games
- Send half of the team behind one goal, and the other half behind the other goal
- Hand out training vests to one of the teams
- Assign a number (1 through X) to the players in each team
- Make sure they are lined up behind the goal, not in front of it
- The players will try to line up to the side of the goal, but they will not have the discipline to stay several steps away to the side of the goal and will get in the way of the game, so send them behind
- The coach stands to the side of the box with all of the balls
Game

- Coach calls out a number (ex. 1) and passes a ball into the field
- The two opposing players who are assigned the said number (ex. 1) run into the field
- Players try to beat each other to the ball
- Players play 1-on-1 until either
- A goal is scored
- Or the ball runs out of bounds
Game 2 – 2-on-1 – 10 minutes
Setup
- Place a goal on one end of each box
- 1 ball per box
- Keep other balls around so the drill can go on if the ball gets cleared away far
- For a box that has 5 players
- 2 sets of 2 attackers + 1 defender
Instruction
- The attackers should move to “open up” for their teammate who has the ball, set a clear path for a pass between them
- If the one without the ball just stands there it will be easy for the defender to defend him
- The attackers should use the entire width of the box to make it more difficult for the defender
- The movement can be creative and can employ the “overlap” run taught in Week 4 Game 4
- The attacker with the ball should not force a pass to a teammate if the teammate is not open
Game
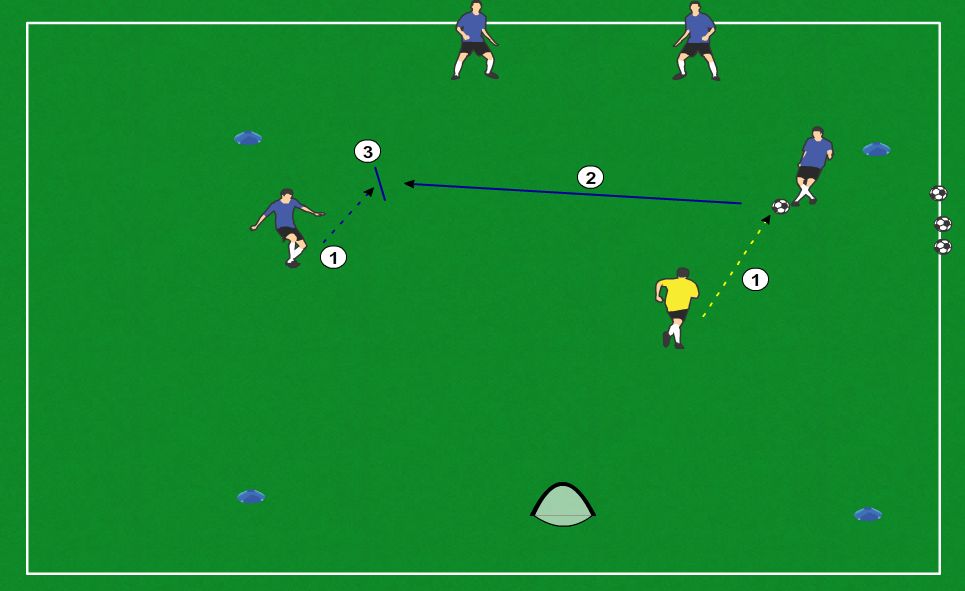
1. As the defender pressures the ball, the other attacker looks to “open up” by establishing a clear path for the teammate to pass the ball; 2. The ball is passed; 3. The 2nd attacker traps the ball
- 2 attackers try to score a goal by beating 1 defender
- Minimum of one pass has to happen before the attackers can shoot
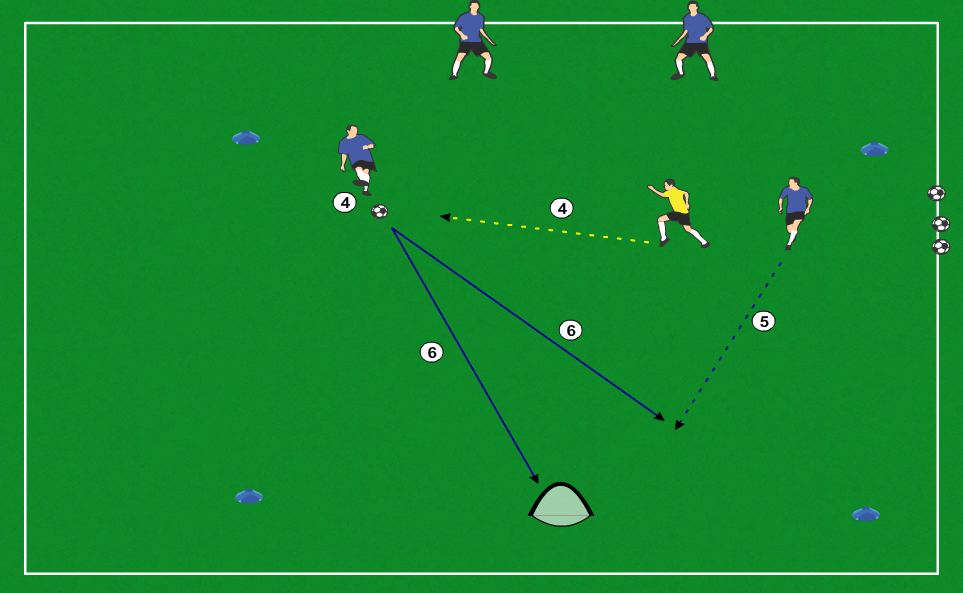
4. The 2nd attacker turns the ball towards the goal while the defender tries to close the ball down; 5. The 1st attacker makes a run towards the goal; 6. The 2nd attacker either shoots the ball into the goal or passes it back to the 1st attacker who will then shoot it into the goal
- Defender scores by clearing the ball out of the box
- Keep one player as the defender for 2 minutes then switch
- This will help the drill move along better
- Keep the sets of attackers switching after each attempt
- Set 1 tries to score
- Set 2 goes after them
- After 2 minutes, 1 of the 4 attackers becomes a defender, and the previous defender takes the vacated spot as an attacking partner in one of the 2 sets
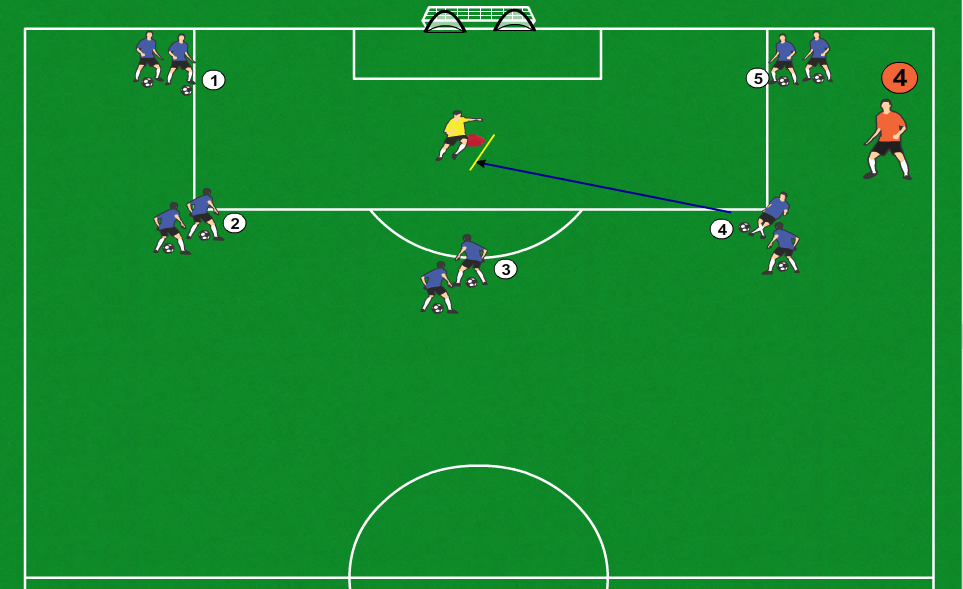
Drill 4 – Trap and Shot Placement – 10 minutes
Setup
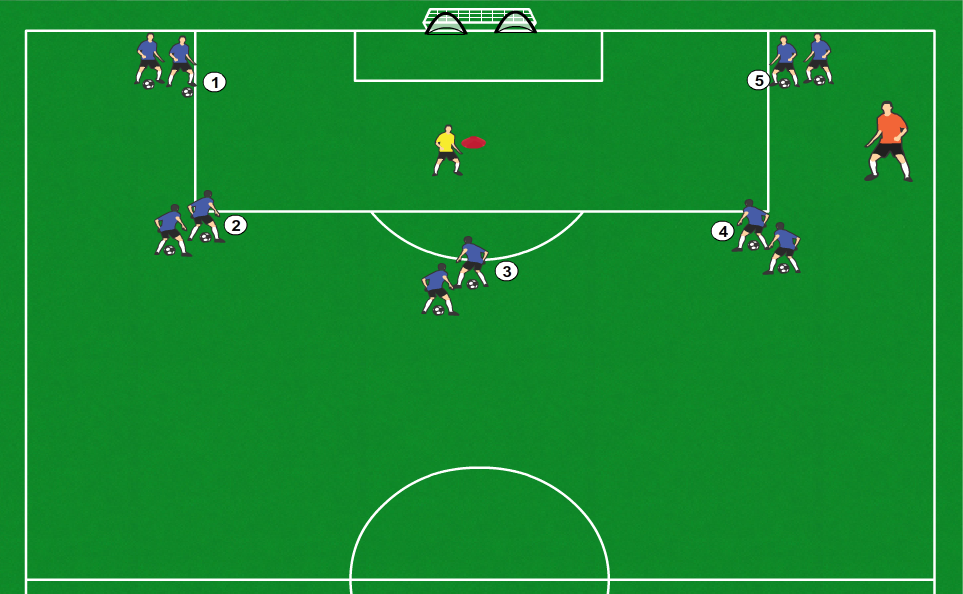
- Set 2 Pugg goals inside a big goal
- Right next to the 2 posts
- This will encourage players to aim for the areas right next to the posts when shooting the ball
- Right next to the 2 posts
- Set a cone at about the penalty spot and send 1 shooter to that cone
- The shooter does not have a ball
- Split the rest of the team evenly across 5 passing stations, located around the penalty box
- Give each station a clear number and let the players at that station know that they are assigned that number
- Passers at each station are lined up behind each other
- Each passer has a ball
- The coach (in orange in the picture above) is off to the side
Instruction
- Remind players to trap the ball on their 1st touch in the direction that will help them set up the next touch (the shot)
- Remind players to use the inside of their foot for accuracy, rather than the laces for power, for this drill
Drill
- The coach yells a number that corresponds to one of the passing stations (one where a passer is ready)
- The 1st passer from that station passes the ball to the shooter
- The shooter traps the ball with the 1st touch in the direction that will help set up a shot on the 2nd touch
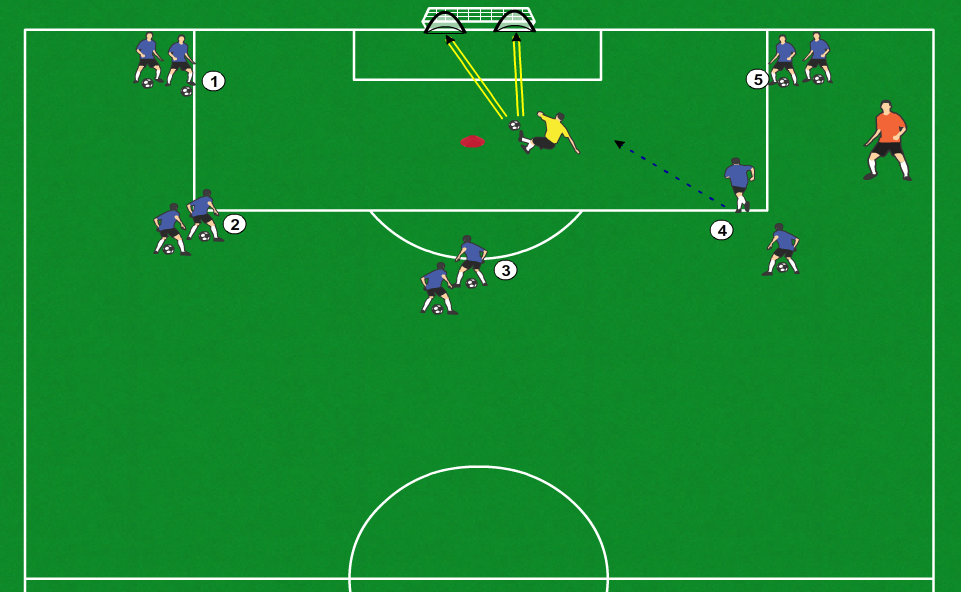
- The shooter places a shot into one of the 2 smaller goals
- The passer retrieves the ball and then joins the same station with the ball
- The passer is careful not to get hit by either a pass or a shot
- The coach calls the next number
- The shooter checks back to the cone to receive the pass, trap it, and shoot it
- Switch shooters every 45 seconds to 1 minute until everyone has had a turn
Game 3 – Offense vs Defense – 10 minutes
Objective
- Attackers want to score on the big goal against a goalkeeper
- Defenders want to score on either of the small goals
Setup
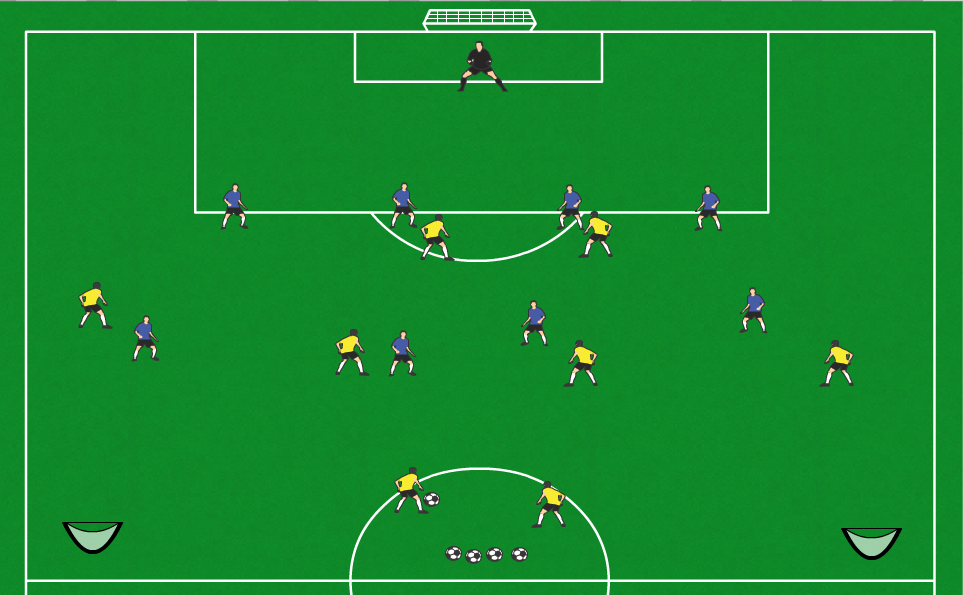
- Split players into two equal teams
- Put a goalkeeper in the big goal
- Give the goalie the same instructions as you would on gameday
- Offense is attacking the big goal
- Set up two small goals, one on each side, a few steps short of the halfway line and a few steps to the inside of the sideline
- All of the balls are in the center circle
- In another variation, the balls can be in the goal, and the drill can start with the goalie punting the ball or a defender/goalie taking a goal kick to the attackers to control and then play
- This variation can be challenging for younger players as it is sometimes difficult for them to control a punt
- In another variation, the balls can be in the goal, and the drill can start with the goalie punting the ball or a defender/goalie taking a goal kick to the attackers to control and then play
Game
- Start with a pass from the center circle each time any of the following happens:
- Offense scores
- Offense takes a shot and the goalkeeper saves it
- Ball goes out of bounds
- Defense scores on one of the small goals
- After winning possession of the ball, the defense should look to as quickly as possible do the following:
- Get the ball out of wide
- Move it down the sideline to score
- Switch who is on offense/defense after 5 minutes
End Practice – 5 minutes
- Thank the players for the wonderful season and praise them for everything they learned
- Dribbling, trapping, passing, shooting, and defending
- Team cheer
- 1,2,3 Go “team name”!