Dribbling And Control

Week 2 Soccer Practice Drills for U4, U5 & U6 Teams

Setup

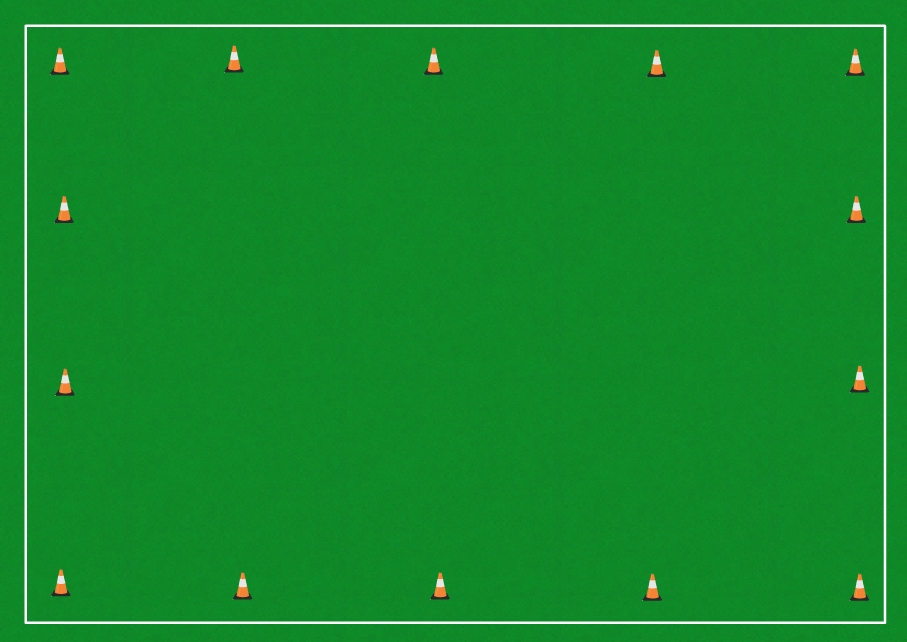
Field Setup

  • Each player has a ball
  • Set down cones to make a 40×30 steps field for 10 players – larger if more players
    • Anything can be a cone (an article of clothing, a water bottle, any marker)
    • Set cones every ten steps
  • Do not set up any goals
    • If there are goals, players will shoot on them and not listen to you
  • Demonstrate each drill / game before starting it


Drill 1 – 5 minutes

https://youtu.be/VQPjXl48cl0
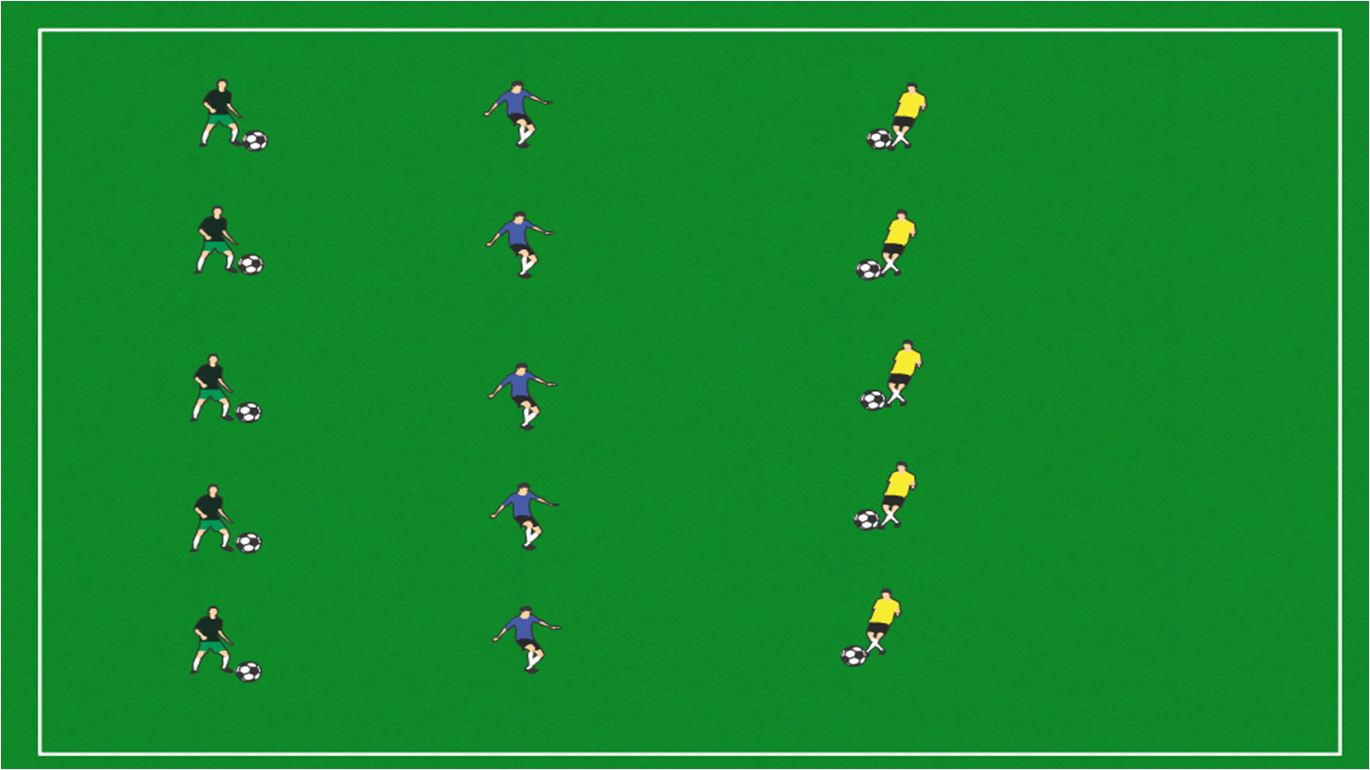
  • Dribble the ball anywhere within the field of play, using only your feet
    • Remind players that they can use any part of their foot
  • Use the entire space
    • Do not let players bunch up
  • Keep the ball close while dribbling
    • Can the players run and keep the ball under control
    • Players who are walking should be urged to run
    • Players who are running too fast should be urged to slow down in order to stay under control

Game 1 – “Lights” – 5 minutes

Objective: Follow directions to get to the opposite side of the field
https://youtu.be/L65QV-kuWZM
  • Players line up on one of the long (40 steps) sidelines
  • You are on the opposite sideline
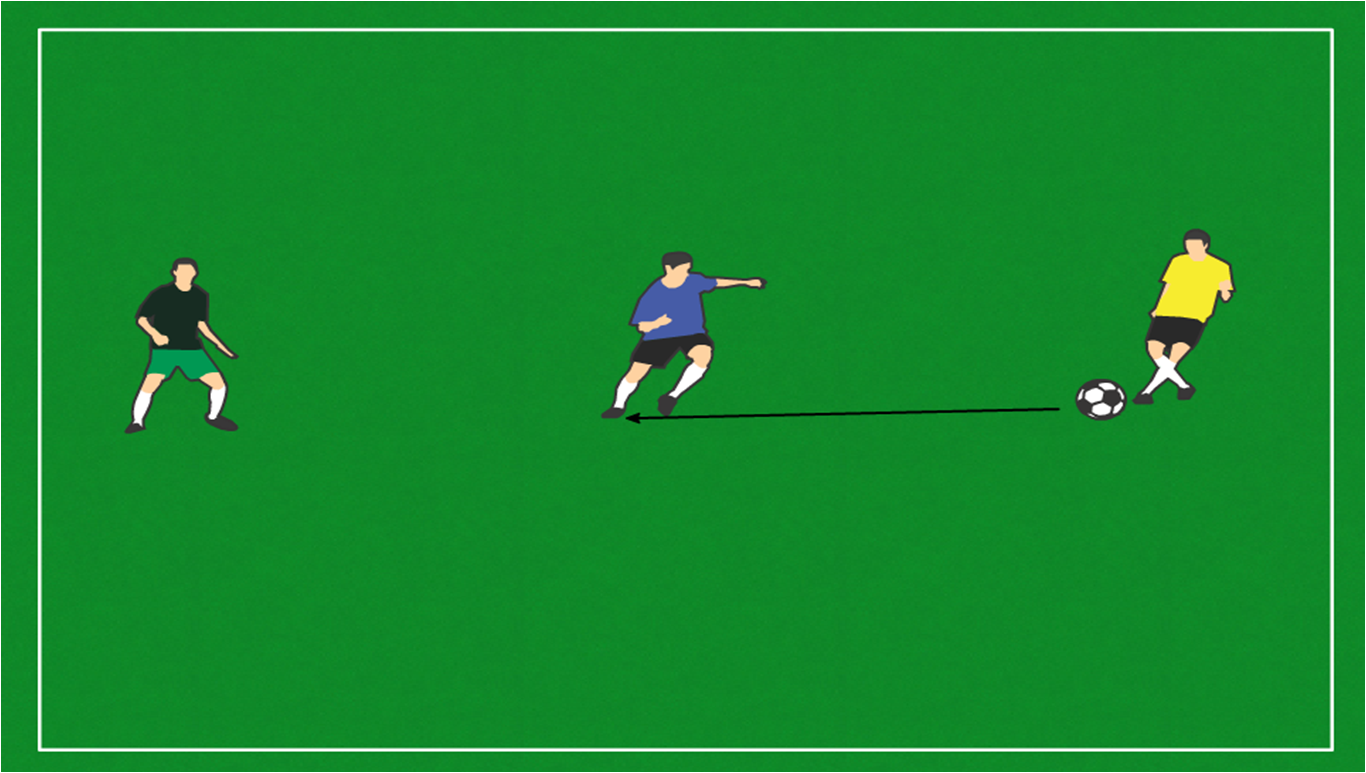
  • Game: Call out a color light
    •  Green light: they run and dribble towards you
    •   Yellow light: they walk and dribble towards you
    •   Red light: they stop the ball with the bottom of their foot – the sooner the better (Remember the HINT from the previous drill: keep the ball close to you)
    •   Disco light: they stop and give you their best dance moves
  • If players advance too fast because they are not under control, send them back to their last spot
    • There are no winners for reaching the opposite sideline first, everyone goes at their own pace
  • After players reach the opposite sideline, you go to the other side and do it again


Drill 2 – 5 minutes
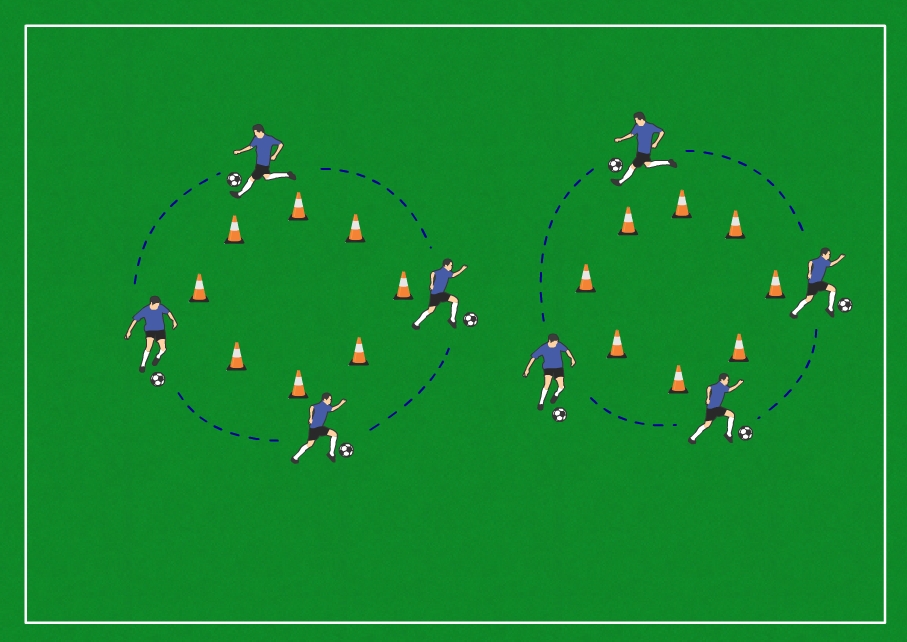
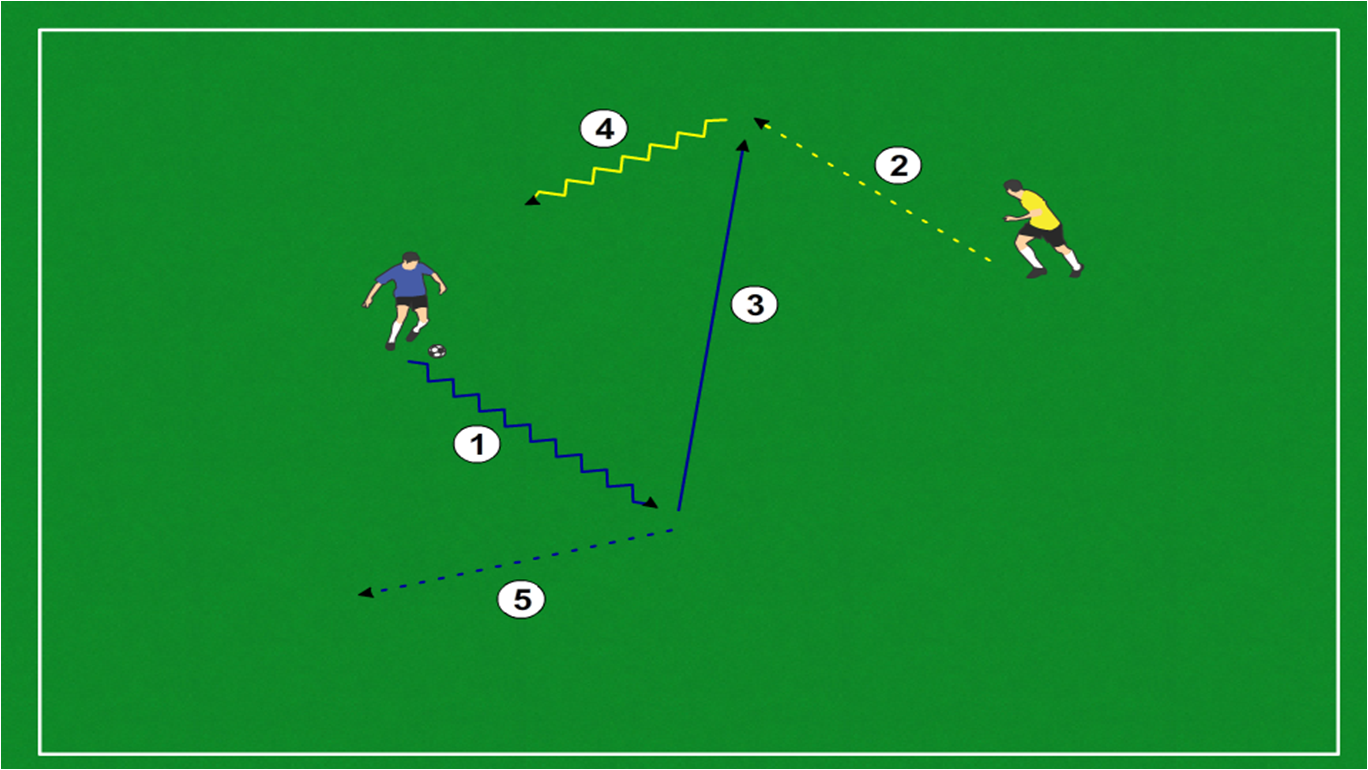
Week 2 Level 1 Drill 2 - Circles

  • Use cones to set up two circles within the field of play
    • Send half of the team to one circle and half of the team to the other circle
    • You will use these two circles for the rest of the practice
  • Dribble around the outside of the circle
    • Everyone goes in the same direction
  • Every minute or so, switch which direction you are dribbling in


Game 2 – “Relay” – 5 minutes
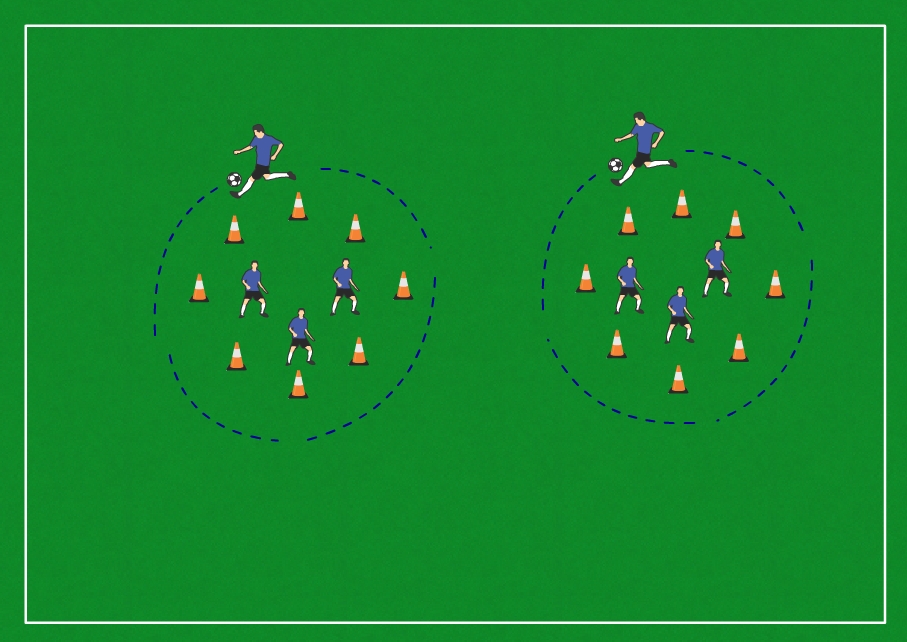
Week 2 Level 1 Game 2 - Relay

  • Remind players to keep the ball close to them so they can control where it goes
  • One player at a time on each circle
    • The other players line up inside the circle to wait their turn
  • Dribble around the circle once
    • When finished, a teammate takes the ball and does the same
  • Once everyone is done going around once, do it again, going the other way
  • Repeat two or three times


Drill 3 – 5 minutes

Week 2 Level 1 Drill 3 - Relay

  • Same as Drill 2, except players now slalom through the cones
    • If you go to the right of the first cone, go to the left of the next cone

Game 3 – “Slalom Relay” – 5 minutes

  • Same as Game 2, except the players now slalom through the cones


Game 4 – “Ball Retriever Circle Challenge” – 10 minutes
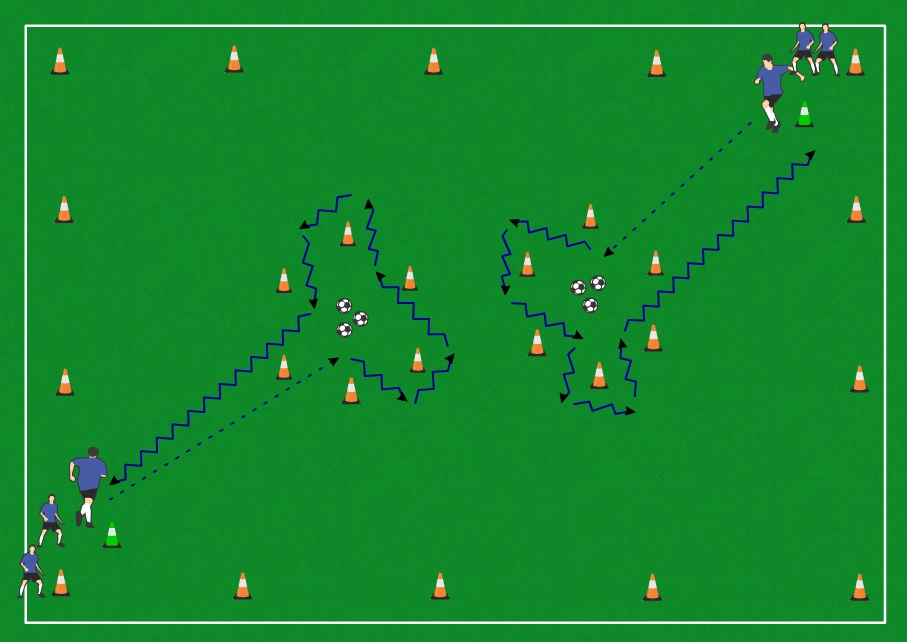
Week 2 - Level 1 - Game Ball Retreiver

  • Objective: Dribble a ball back to your base after completing a dribbling challenge around the circle
  • Setup
    • Put a couple of cones down to create a base in two opposing corners of the field
      • Half of the team lines up behind one base, the other half lines up behind the other base
    • Put all of the balls in the two circles
      • Number of balls in a circle = Number of players in the corresponding base
    • 2 players go at a time, starting from their bases in opposing corners of the field
      • The players are not competing to beat the other player, but to complete the challenge
        • The rest of the players line up behind their base and wait their turn
  • When you say “Go!” the players run to the balls and dribble them by slaloming around the circle
  • After getting around the circle, the player dribbles the ball back to the base
  • The next 2 players go
  • When everyone has completed the challenge, do it again but this time dribble in the other direction

Drill 4 – 5 minutes
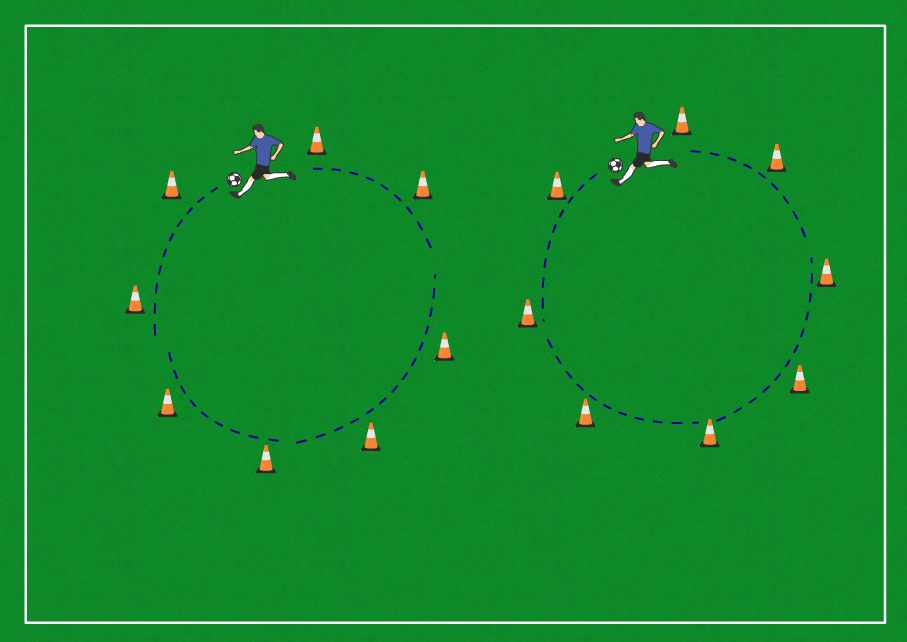
Week 2 Level 1 Drill 4 - Inside Circle

  • Dribble inside the circle
    • Less space requires more effort to control the ball


Drill 5 – 5 minutes
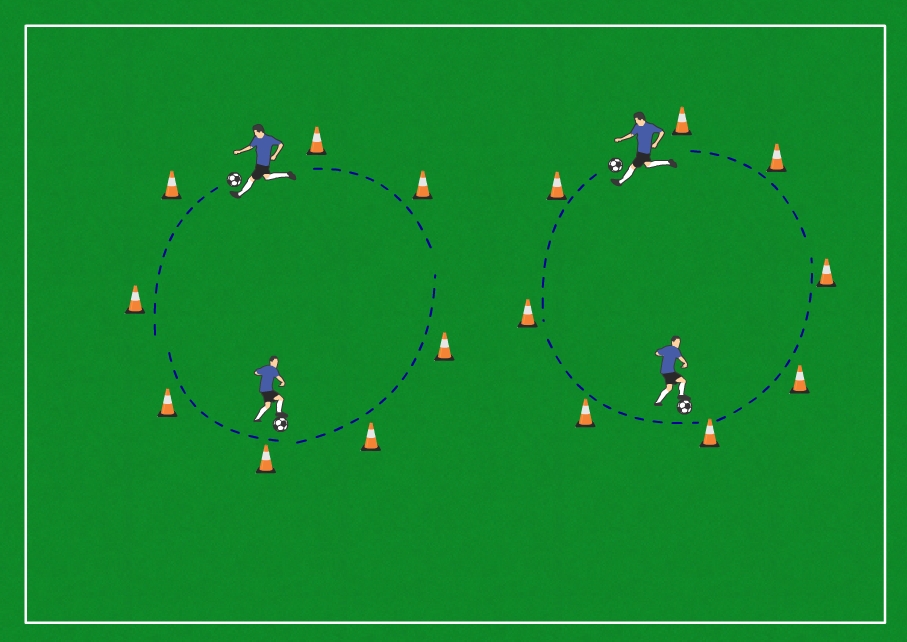
Week 2 Level 1 Drill 5 Shield

  • Teach the players to “shield” the ball
    • Put your body between the ball and the opponent trying to steal the ball
      • Keep the ball close enough to you to control it but far enough from the opponent to steal it
  • Interchangeably call out “dribble” or “shield”
    • “Dribble” – players will continue to dribble inside the circle
    • “Shield” – players will stop the ball with the bottom of their foot and put their body between the ball and an “imaginary opponent”

Game 5 – “Cookie Monster” – 5 minutes
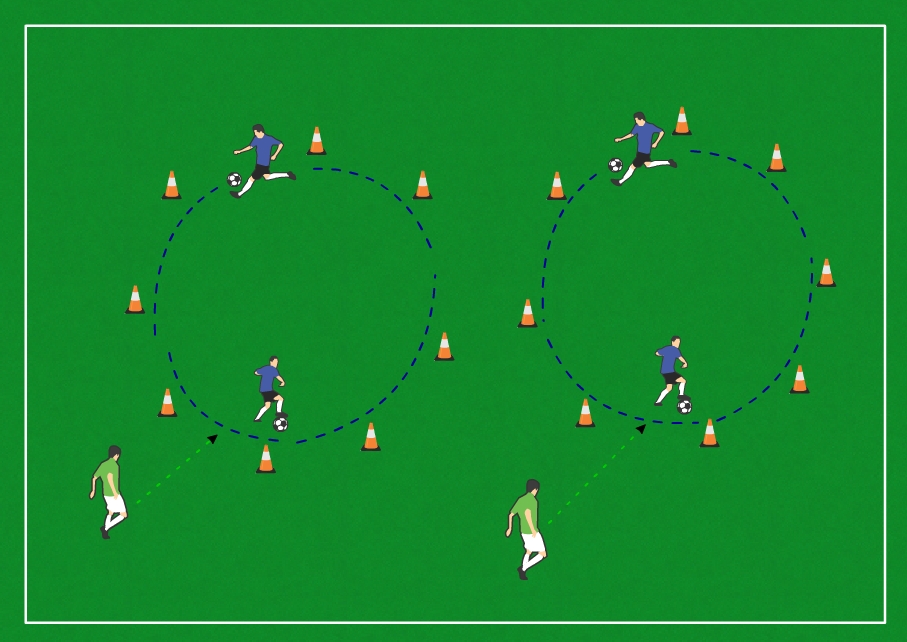
Week 2 Level 1 Cookie Monster

  • Recruit two “cookie monsters”
    • Two adults – one for each circle
      • You could be one of them, but it is better for you to coach and correct the players
  • Ball = cookie, for the purposes of this game,
  • Players dribble inside the circle
    • When a cookie monster approaches them, they shield the cookie by getting between it and the cookie monster
    • When cookie monster leaves, the players continue to dribble


End Practice

  • 1,2,3 Go “team name”!
 

Dribbling And Control

Week 2 Soccer Practice Drills for U7, U8 & U9 Teams

Setup


Field Setup

  • Each player has a ball
  • Set down cones to make a 50×40 steps field for 12 players – larger if more players
    • Anything can be a cone (an article of clothing, a water bottle, any marker)
    • Set cones every ten steps
  • Do not set up any goals
    • If there are goals, players will shoot on them and not listen to you
  • Demonstrate each drill / game before starting it

Drill 1 – 5 minutes

https://youtu.be/VQPjXl48cl0


  • Dribble the ball anywhere within the field of play
  • Use the entire space
    • Do not let players bunch up
  • Keep the ball close to you while running
    • Can the players run and keep the ball under control
    • Players who are walking should be urged to run
    • Players who are running too fast should be urged to slow down in order to stay under control


Drill 2 – 5 minutes

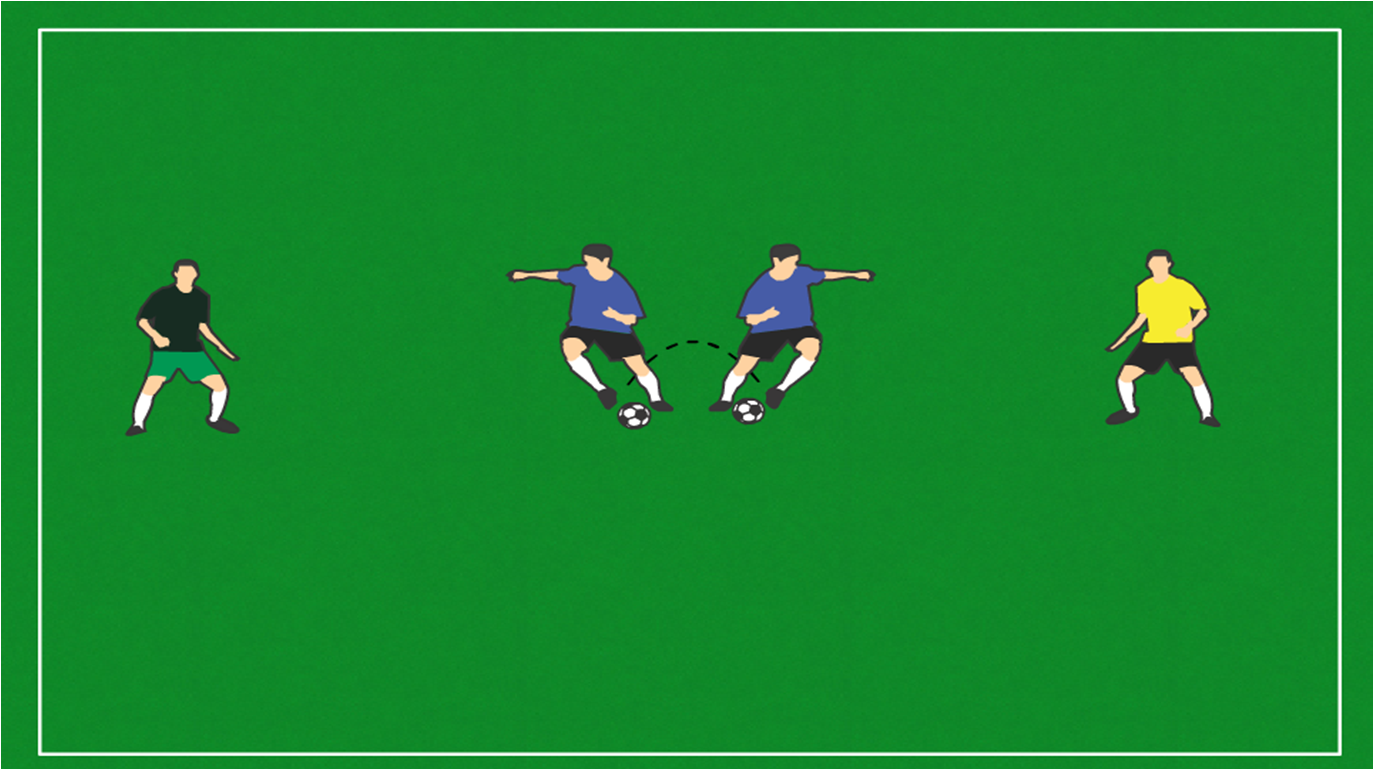
  • Review the 2 moves learned during Week 1
  • Continue dribbling as done in Drill 1, but every 30 seconds or so ask the players to perform one of the two moves


Drill 3 – Stepover move – 10 minutes

  • Demonstrate the move
    • Dribble at a moderate pace
    • Then, instead of taking a touch, step over the ball with one foot (to freeze the defender)
    • Use the other foot to take the ball around the defender
    • Accelerate for several steps
    • Go back to dribbling regularly at a moderate pace
  • For the first 5 minutes, players dribble, but when you say “Stepover” they perform the move
  • For the next 5 minutes, players dribble, but when you call out a move (stop-and-go, inside-out, stepover), players perform the move you called out


Drill 4 – Passing – 10 minutes

Passing inside

  • Demonstrate proper passing technique
    • Find your target (where you are passing)
    • Take two steps away from the ball
    • Run up to the ball so that your planted (non-kicking) foot is to the side of the ball, and slightly behind it, and pointing in the direction you want the ball to go
    • Lock the ankle of your kicking foot, so it is sturdy and the toes are pointing slightly up
    • Use the inside of your foot to kick the ball in the center of it
    • Follow through with your kicking foot so that it comes off the ground, about shin-high

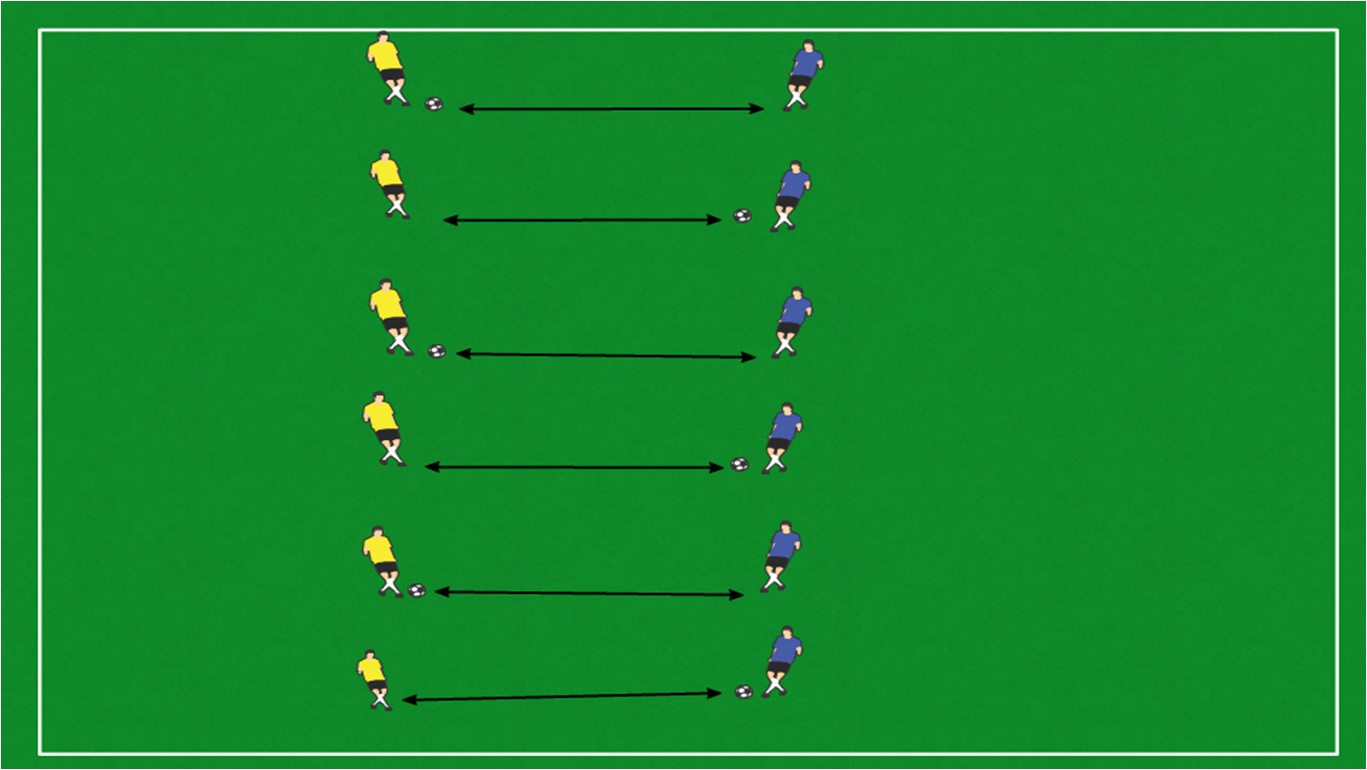
Pass 10 Yards Apart

  • Split the players into two equal teams and give one of them pennies to wear
    • Assign partners, one wearing a pennie and the other one not
  • Standing about 10 yards apart have the partners pass the ball to each other on the ground for about 2 minutes

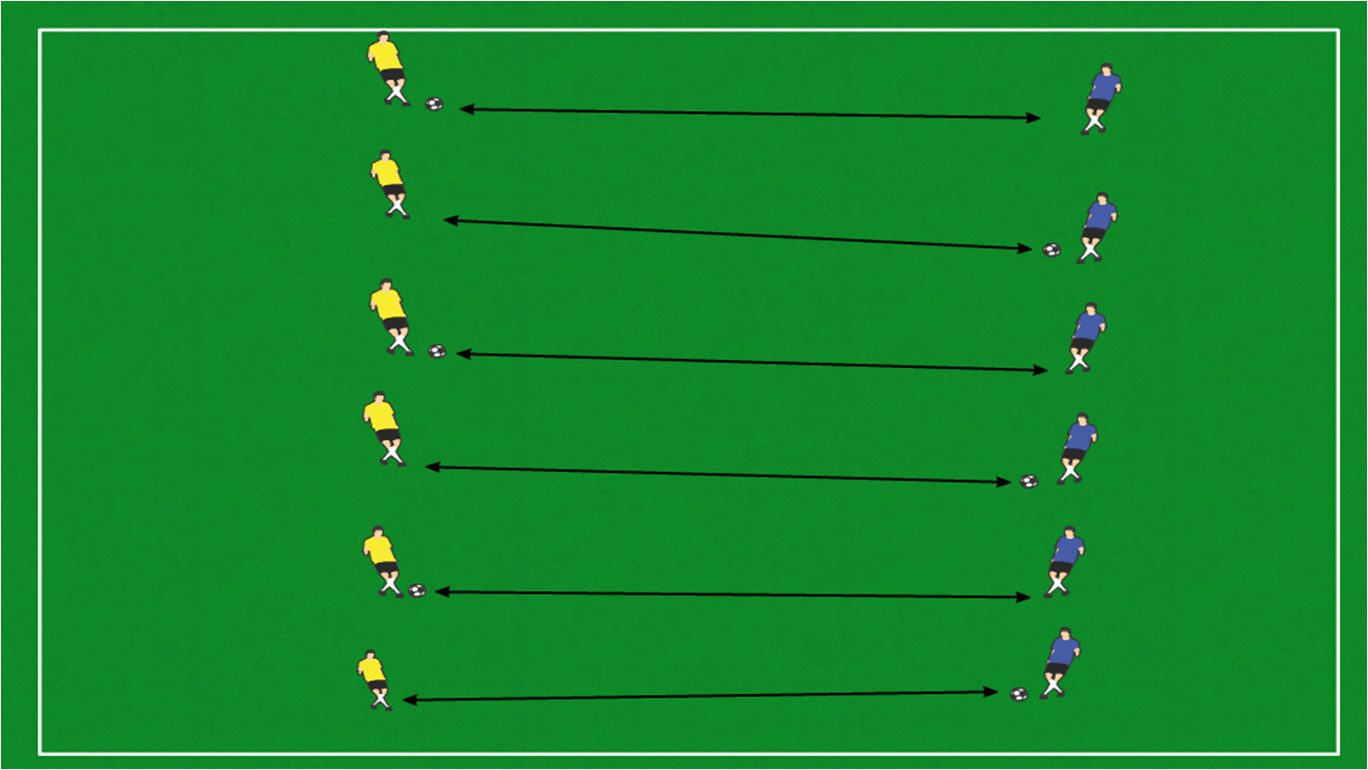
Pass 20 Yards Apart

  • Move the partners farther apart (about 20 yards apart) and have them pass the ball to each other on the ground for about 3 minutes
Dribble Stand Pass

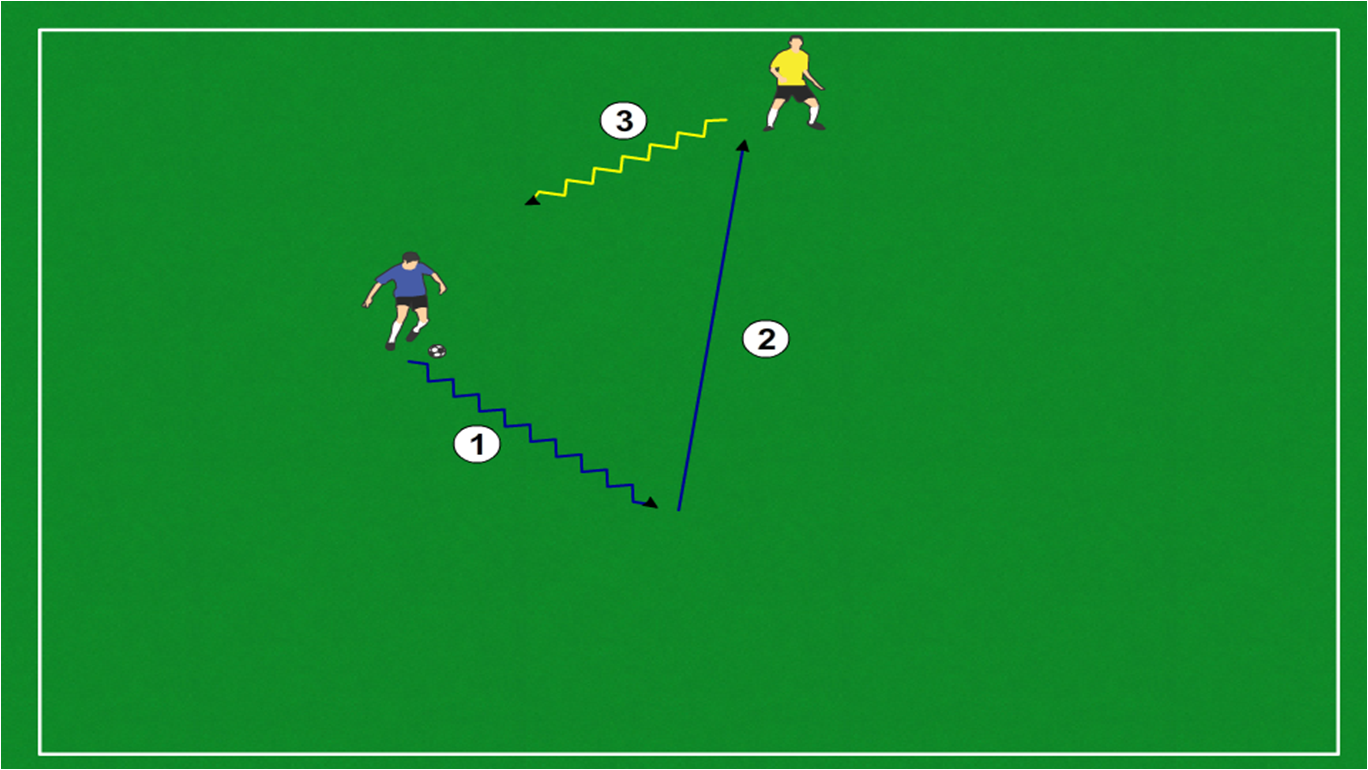
1. Partner with the ball dribbles the ball; 2. Upon the “Pass!” command the dribbling partner passes the ball to the standing partner; 3. The standing partner now becomes the dribbling partner and vice versa until the new “Pass!” command

  • For the next 2 minutes, have one partner dribbling the ball in the field of play and the other partner standing in one spot without the ball
    • When you say “Pass” (every 20 to 30 seconds) the partner with the ball passes it to the one without the ball
    • The partner that did not have the ball is now dribbling while the one who had the ball is standing in place until you say “Pass” and they switch again
Dribble Both Moving Pass

1. One partner dribbles the ball; 2. The other partner moves without the ball; 3. Upon the “Pass!” command, the first partner finds where the other one is and passes the ball; 4. The other partner now dribbles the ball; 5. The partner who first had the ball is now running without it until the “Pass!” command comes again

  • For the final 2 to 3 minutes have both partners moving, one dribbling the ball and the other running around without the ball in the field of play
    • When you say “Pass” the one with the ball finds where the other partner is and passes it
    • Both partners continue to move

Game 1 – Scrimmage – 15 minutes

Week 1 - Level 2 - Scrimmage

  • Set up a small goal on each of the end lines of your field
    • Either use Pugg goals, or place two cones/bags/shirts about 3 steps apart from each other
  • Players are alraedy split into two teams from the previous drill
  • For the first 5 minutes, demand that any of the three moves (stop-and-go, inside-out, stepover) learned to date must be used before a team can score a goal
  • For the next 5 minutes, demand that a team must make 3 passes before it can score
  • For the final 5 minutes, just let them play without restrictions and see if they continue to use moves and passes


Drill – Move and Shoot – 15 minutes

Week 1 - Level 2 - Move n Shoot

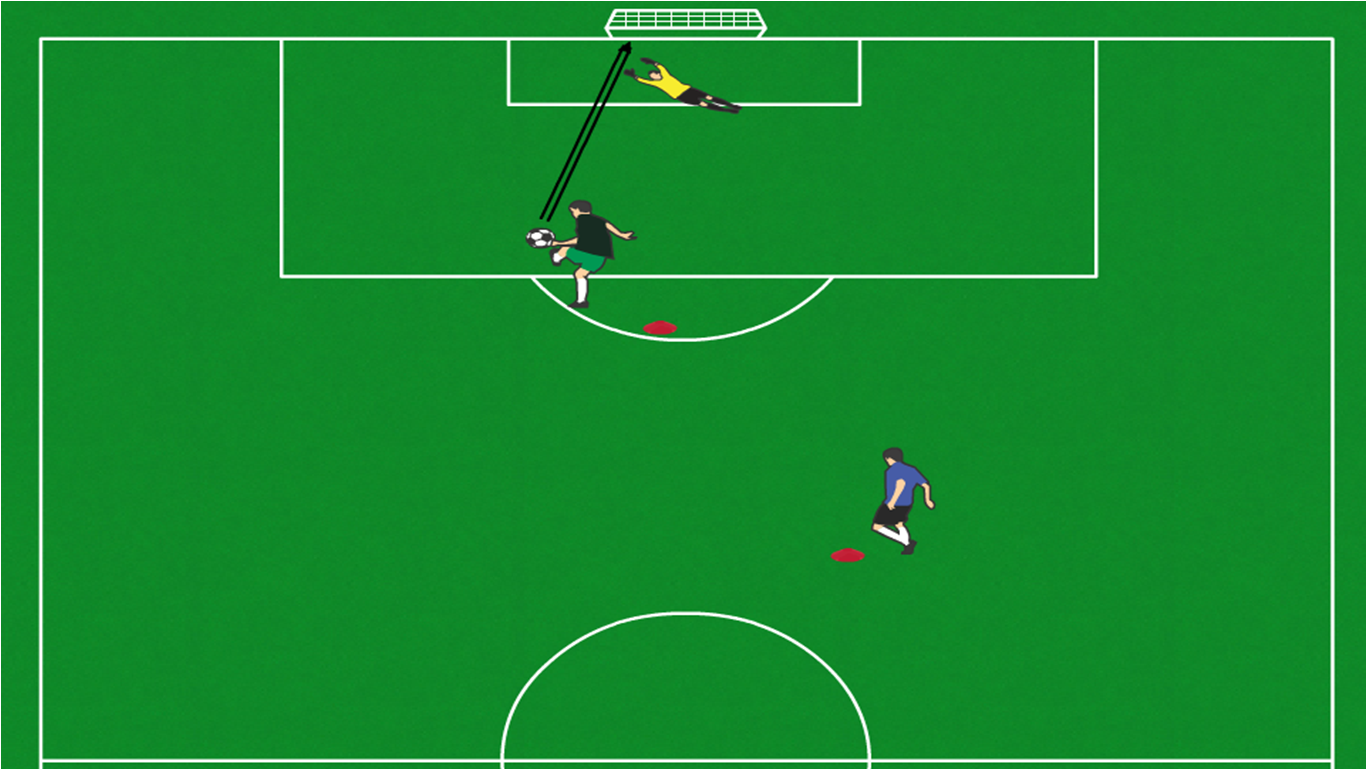
  • Demonstrate proper shooting technique
    • Trap the ball in front of you
    • Take a touch to get the ball 2 to 3 steps ahead of you
    • Run up to the ball, lock your ankle, lean forward so your chest is over the ball, and shoot using either:
      • The inside of your foot to place the ball into the goal (more accuracy less power)
      • The laces to shoot the ball harder (more power less accuracy)
  • Put a goalkeeper in the big goal
    • If you don’t have a goal to work with, place two cones/bags/shirts about 8 big steps apart
      • Give the goalkeeper the same instructions as you would on gameday
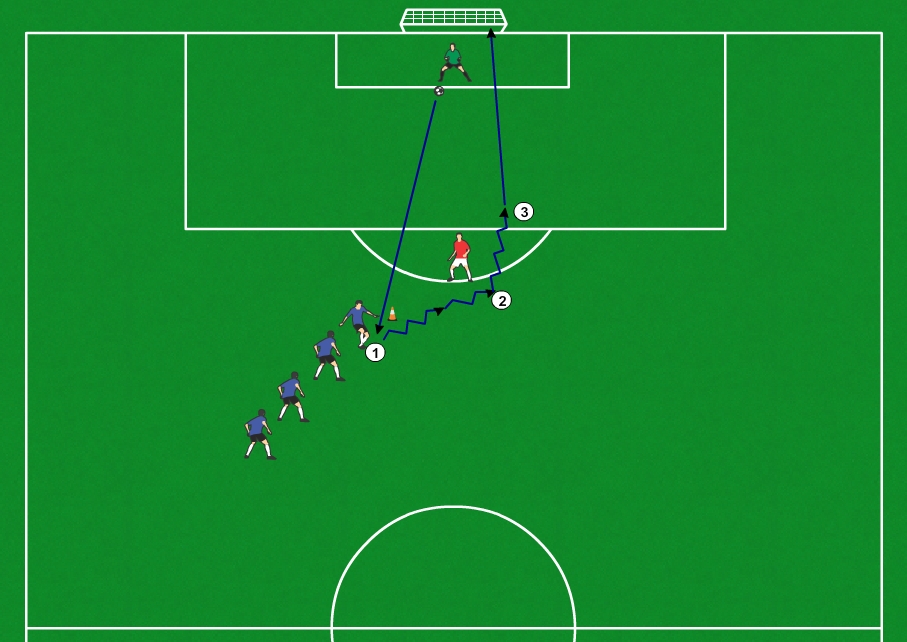
  • Players line up about 20 yards away from the goal (put a cone down that players will stand behind)
  • Have the goalie pass the ball to the player
  • Player traps the ball, dribbles towards the goal, beats a defender (you) with a move, and shoots the ball into the goal
    • Just pretend to play defense, don’t try to take the ball from the players
    • Make sure to stand closer to the players receiving the ball than the goalkeeper
      • When the player beats you he should not be right by the goalie, but should have to take a shot from some distance (10 to 15 yards out)
  • Player, not the goalie retrieves the ball and goes to the back of the shooting line

End Practice

  • Team cheer
    • 1,2,3 Go “team name”!
Dribbling And Control

Week 2 Soccer Practice Drills for U10, U11 & U12 Teams

Setup

Field Setup

  • Each player has a ball
  • Set down cones to make a 60×50 steps field for 18 players – larger if more players
    • Anything can be a cone (an article of clothing, a water bottle, any marker)
    • Set cones every ten steps
  • Do not set up any goals
    • If there are goals, players will shoot on them and not listen to you
  • Demonstrate each drill / game before starting it


Drill 1 – 5 minutes

  • Dribble the ball anywhere within the field of play
  • Use the entire space
    • Do not let players bunch up
  • Keep the ball close to you while running
    • Can the players run and keep the ball under control
    • Players who are walking should be urged to run
    • Players who are running too fast should be urged to slow down in order to stay under control
  • Have the players perform some moves on your command
    • Stepover, Inside-out, Outside-in, Stop-and-go, Cruyff, Inside-inside (go here to find videos showing these moves)

Drill 2 – 5 minutes

  • Juggle the ball for 5 minutes
    • The objective is to keep the ball from falling to the ground using your feet, thighs, shoulders, or head. Give the players 5 minutes to see how many touches they can get without the ball falling to the ground.
      • Players should remember their high score
      • Keep the high score to themselves. In future practices they will try to improve on this high score

Drill 3 – about 8 minutes with setup

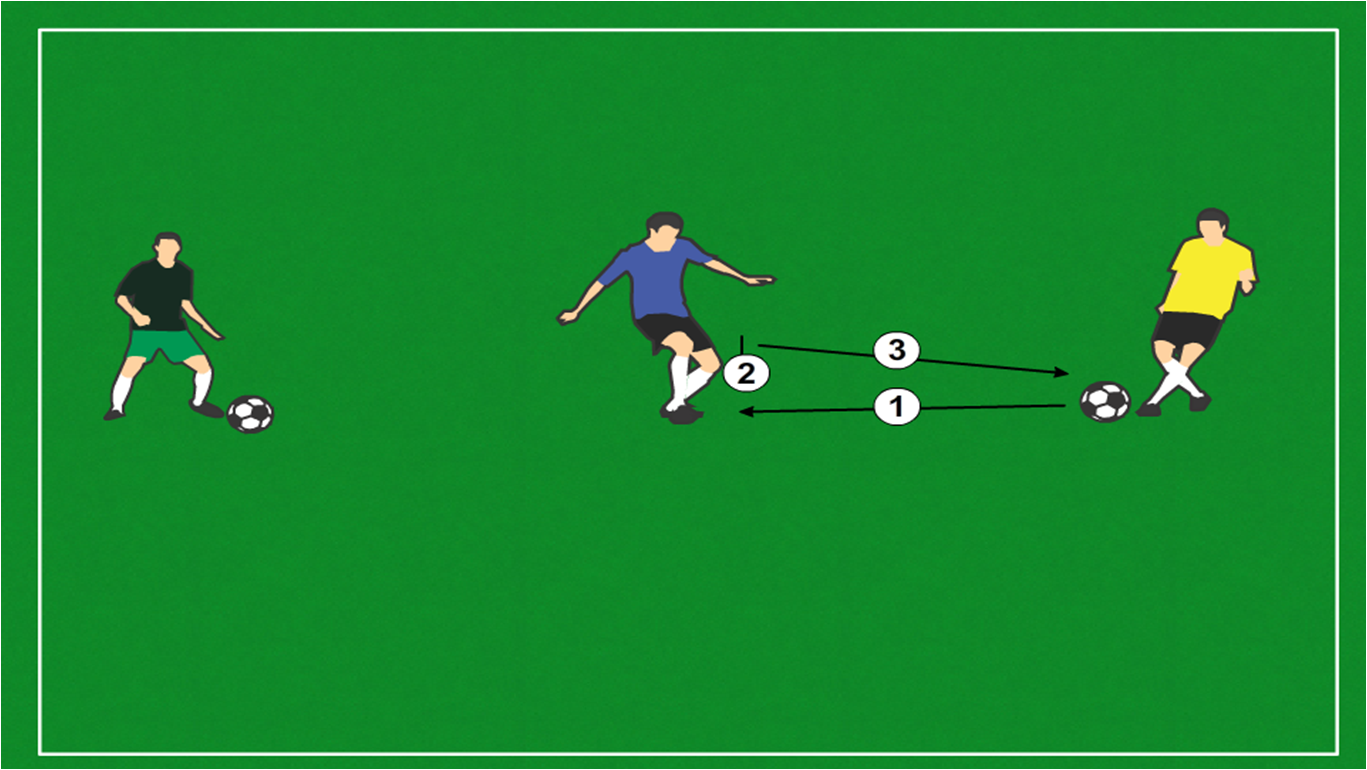
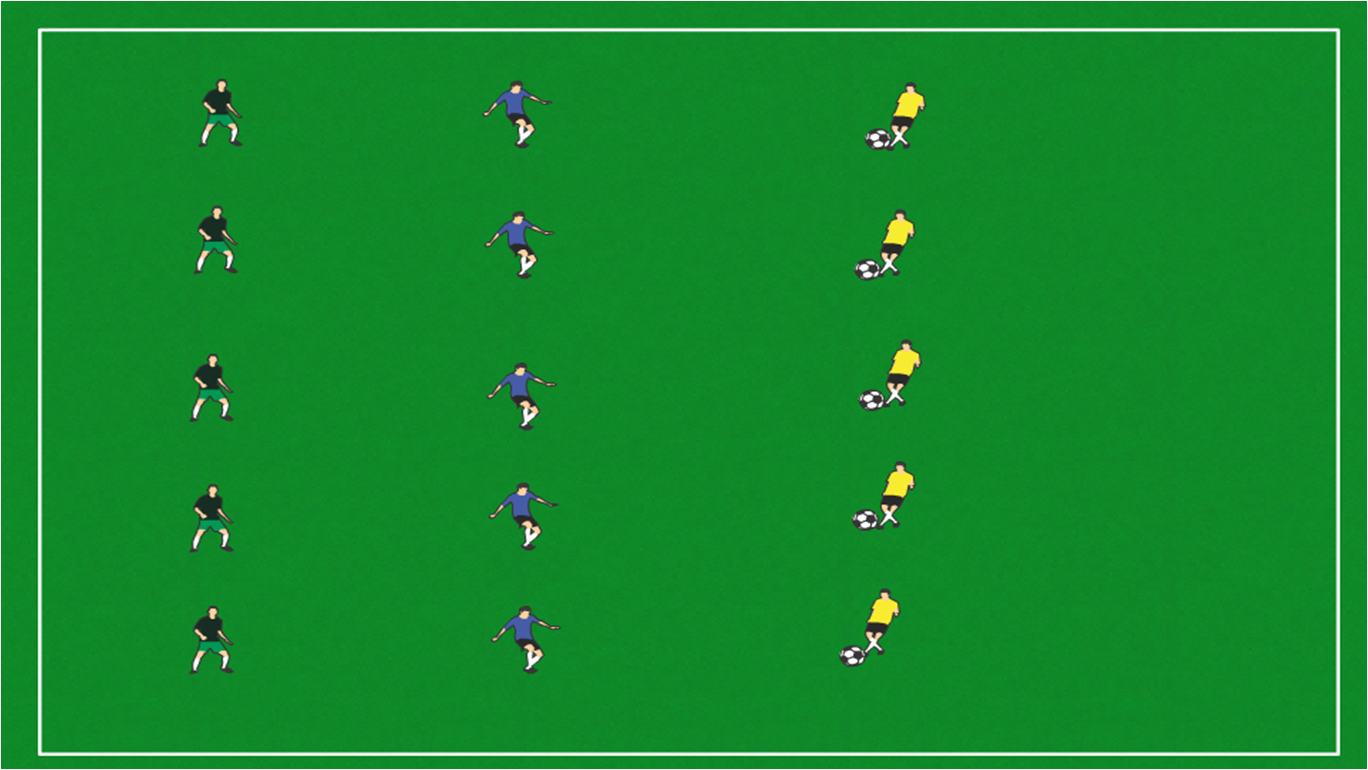
Setup 3 Passbacks

Setup: 3 lines of players; Outside players facing one another about 20 yards apart; Outside players with the ball; Inside player without the ball

  • Split the players into groups of 3
    • If the numbers do not work out, you can make one or two groups of 4
  • Create two lines, about 20 yards apart
  • 2 of the 3 players will stand on these two lines, facing each other
  • Each of the two players will have a ball at their feet
    • The 3rd player will be somewhere in the middle of the 2 lines, without a ball
      • For groups of 4 there will be two players in the middle
3 set Passback Step 1

1. Outside player passes the ball to the inside player 2. Inside player traps the ball 3. Inside player passes the ball back to the outside player

  • An outside player passes the ball to the player in the middle
  • The player in the middle traps, one to two steps in front, and pass it back to the outside, taking 2 touches
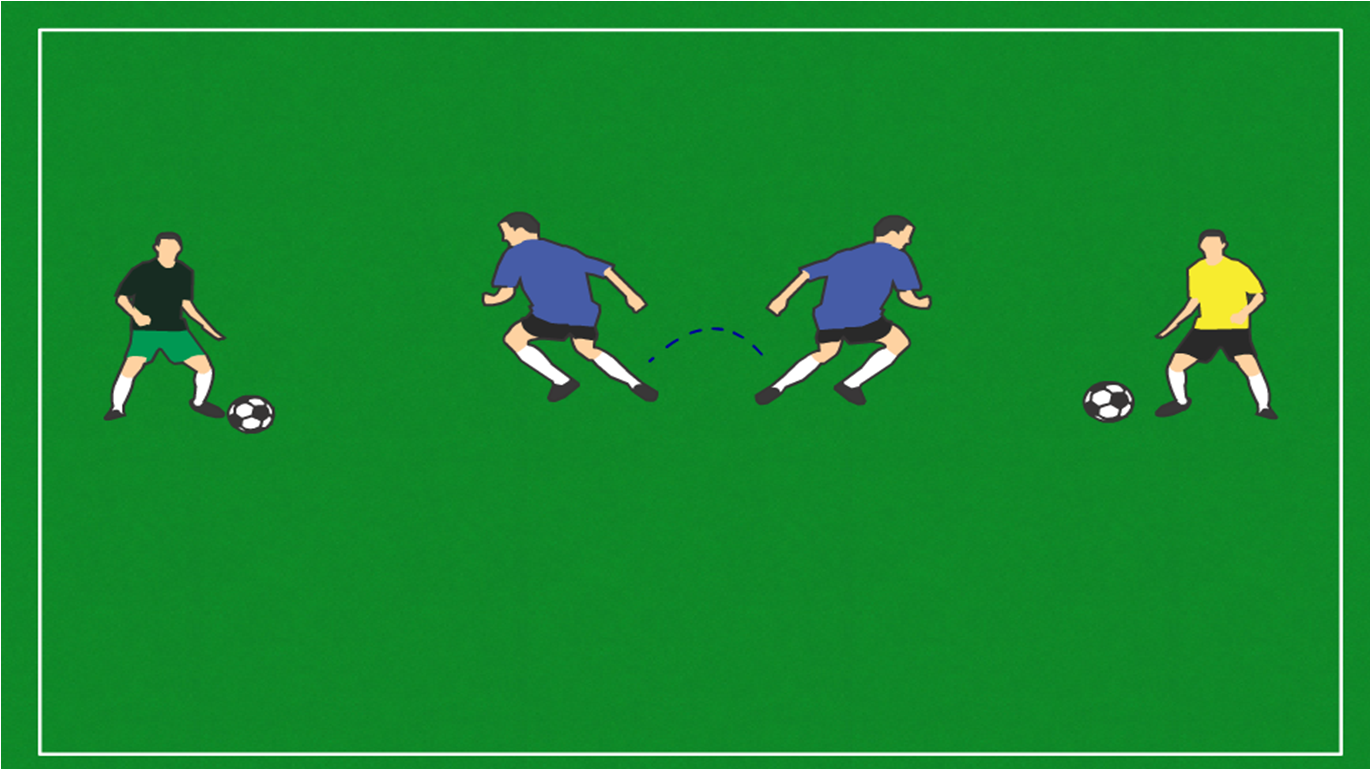
3 set Turn Without Ball

The player in the middle turns to face the other outside player

  • The player in the middle turns to face the other outside player
    • For groups of 4, the two inside players will just switch the direction they are facing in after every pass back
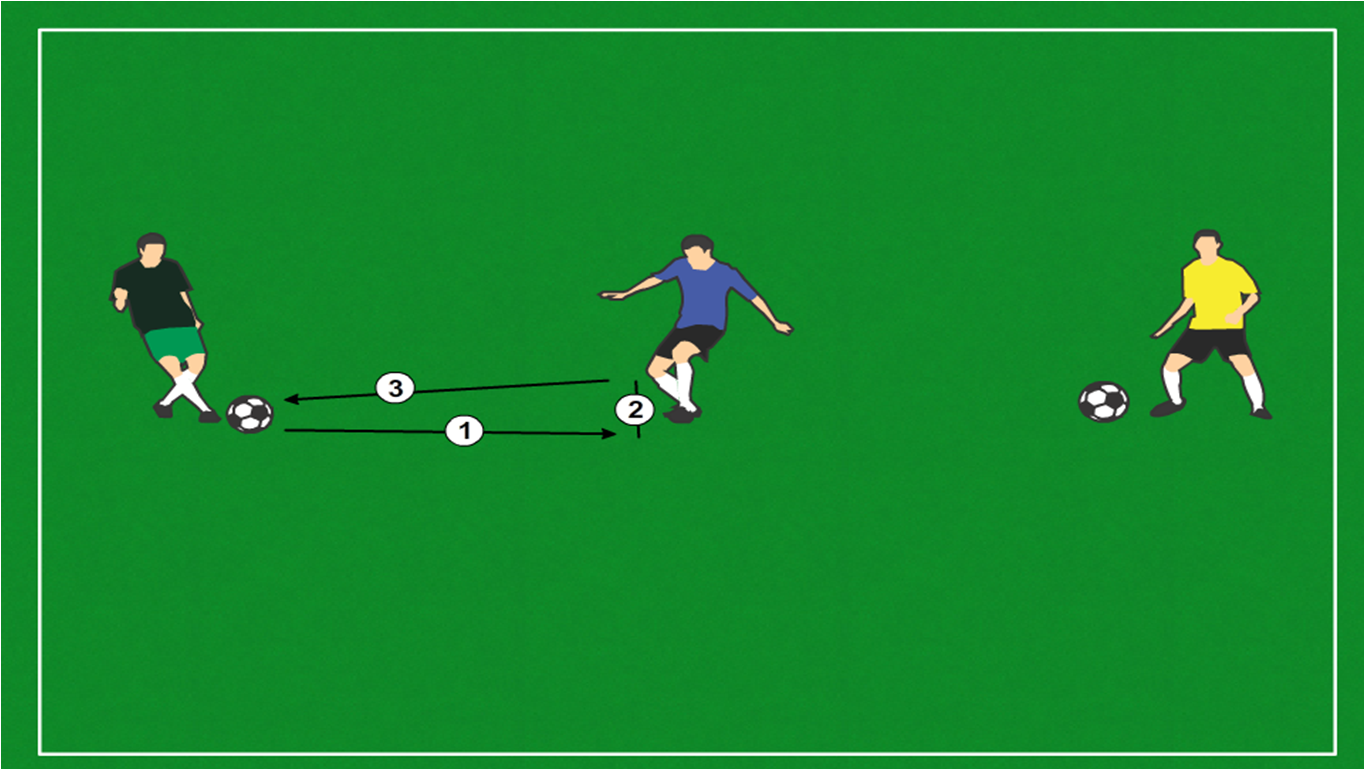
3 set Passback Step 2

1. Outside player passes the ball to the inside player 2. Inside player traps the ball 3. Inside player passes the ball back to the outside player

  • The other outside player passes the ball in and the same is repeated
    • For groups of 4, both of the outside players pass the ball back every time because they have two players in the middle
  • Inside player turns again and keeps going for a minute
  • Switch the middle player with one of the outside players
  • Go for a minute then switch again so that the player who has not been in the middle yet gets to be in that role
    • For groups of 4, this becomes the 2nd time in the middle for two players
  • Repeat each player being in the middle for another minute so that everyone gets at least two turns in the middle

Drill 4 – about 7 minutes

Take a minute to demonstrate turning with the ball

  • As you receive a pass, instead of trapping the ball a step or two in front of you, cradle it under you with the inside of your foot
  • Turn your body to the direction you want to take the ball in
  • Push the ball in that same direction as your body turns
Setup 3 Turns

Setup: 3 lines of players;  Outside players facing one another about 20 yards apart;  One outside player with the ball;  Other two players without a ball

  • Working in your groups of 3 and 2 lines from the previous drill
    • This time only one player out of the three (one of the ones on the outside) will have a ball
3 set Turn With Ball Step 1

The player with the ball passes it to the player in the middle, who cradles it with the inside of the foot


  • The player with the ball passes it to the player in the middle
3 Set Turn With Ball

The player in the middle turns with the ball, pushes it forward slightly to prepare for a pass

  • The player in the middle turns with the ball
3 set Turn With Ball and Pass It Off

1. Player in the middle passes the ball to the outside player; 2. Outside player traps the ball; 3. Outside player passes it back to the inside player, who then turns with it and goes to the other side

  • The player in the middle passes the ball to the player on the other line
  • The player in the middle gets the ball back from the outside, turns with it, and passes it to the other side
  • Keep going for a minute and then switch players
    • The player in the middle switches with one of his teammates on an outside line
  • Go for a minute and switch again
    • The player who has not been in the middle yet goes
  • Go for a minute again
  • Repeat each player being in the middle for a second time for another minute


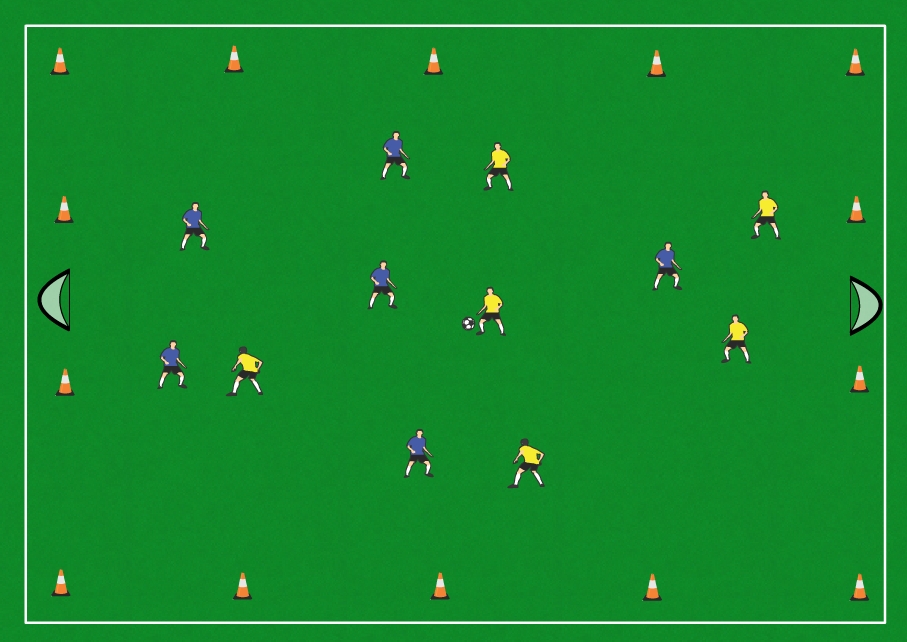
Game 1 – Keepaway – 10 minutes

  • Split the players into two equal teams
    • Provide one of the teams with pennies, the other will wear their regular shirts
  • Play keepaway in the field of play for 10 minutes
    • The objective is to keep possession of the ball
    • There are no directions involved as there are no goals set up
  • Completing 5 passes in a row equals scoring a goal
  • If players are just dribbling and not passing impose a 3-touch limit to force them to pass the ball

Game 2 – Scrimmage – 15 minutes

  • Place goals on the endlines of your field and turn the keepaway game into a scrimmage
  • For the first 5 to 7 minutes, demand that 3 passes be made on a possession before a team can score
  • For the last 8 to 10 minutes, take away that restriction
    • Introduce the touch limits again if players start to hold on to the ball too long, or dominant players don’t pass the ball to the less dominant ones


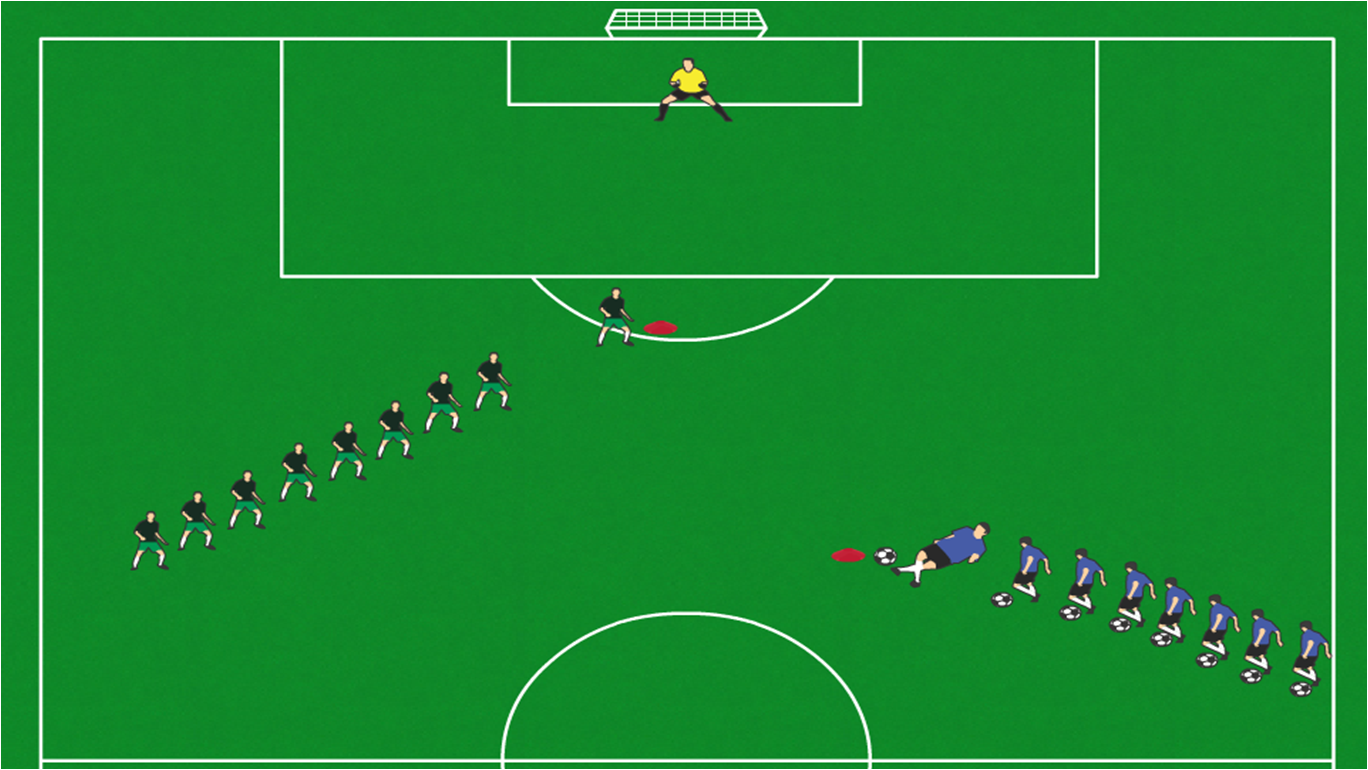
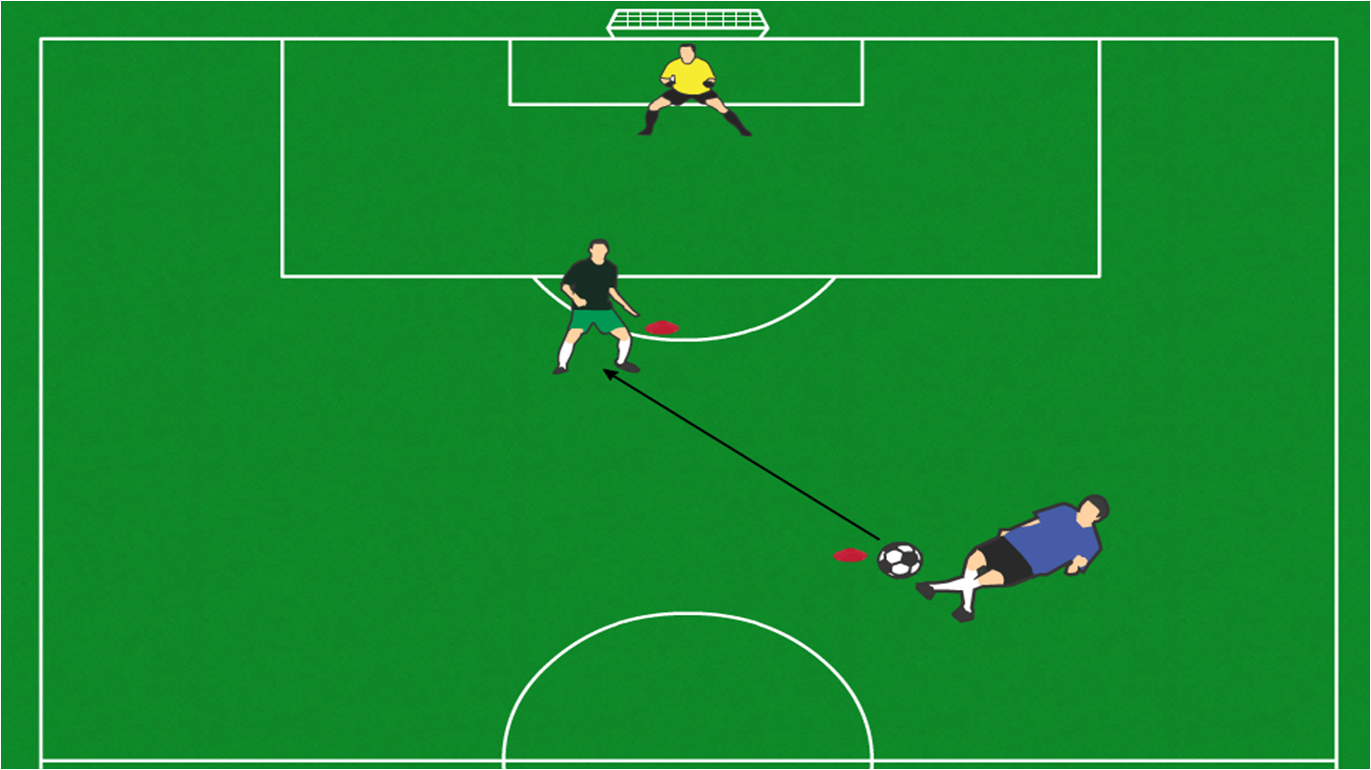
Drill – Turn and Shoot – 10 minutes


  • Demonstrate proper shooting technique
    • Run up to the ball, lock your ankle, lean forward so your chest is over the ball, and shoot using either:
      • The inside of your foot to place the ball into the goal (more accuracy less power)
      • The laces to shoot the ball harder (more power less accuracy)
  • Put a goalkeeper in the big goal
    • If you don’t have a goal to work with, place two cones/bags/shirts about 8 big steps apart
      • Give the goalkeeper the same instructions as you would on gameday

Turn and Shoot Setup

  • Split players into 2 lines
    • The shooting line is behind a cone located about 20 yards away from the goal, in the middle of the field
    • The passing line is another 10 to 15 yards behind the shooting line and has all of the balls

Turn and Shoot Pass

  • Player in the passing line passes the ball to the one in the shooting line

Turn and Shoot Turn

  • The shooter turns with the ball, and takes a touch towards the goal to prepare for a shot

Turn and Shoot Shot

  • The shooter shoots the ball
  • The shooter retrieves the ball and takes it to the back of the passing line
  • The passer joins the back of the passing line
  • Keep going for about 10 minutes

End Practice

  • Team cheer
    • 1,2,3 Go “team name”!
Choosing Formations

Tips On Choosing The Right Formation For Your Team

And why diamonds are a soccer player’s best friend


A formation is simply the way you wish to organize your players on the field during a game. Here we provide some suggestions on formations we have used in the past in the following three competition formats: 4v4, 7v7, and 11v11.

Before we get into the details, let’s take a moment to explain what the numbers in the formations mean. Numbers associated with formations (e.g., 4-4-2) explain how many players you will play in each functional line (let’s call them functional lines), from back to front. In the 4-4-2 example, you would have 4 defenders, 4 midfielders, and 2 forwards.

Sometimes formations may have more than three lines (e.g., 4-1-2-1-2), so starting from the back you would line up 4 defenders, 1 defensive midfielder, 2 regular midfielders, 1 attacking midfielder, and 2 forwards. The goalkeepers are never counted in these numbers, it is assumed that there is exactly one per team if the competition format allows for goalkeepers.

The following advice is meant for recreational players who are still developing and is actually the complete opposite of the advice we would give to teams who are in very competitive leagues.

Continue reading

Goalie by cantanima

3 Things To Tell A Goalkeeper On Gameday

Most teams in recreational leagues, or even travel leagues at young ages, will not have a designated goalkeeper. Chances are that each player on your team will play at least one half during a season as a goalie, and those who really loved playing the position will want to do it for a second time if there are more halves in the season than players on your team. Therefore it is unlikely that you will spend any considerable amount of time at your practice sessions on goalkeeping drills.

Below, we offer some tips that are easy for you to communicate, and easy for the players in goal to understand, and that do not need much practice to make your goalkeepers effective. What I have done in the past is that I decided before my weekly practice who my two goalies will be at the next game and then I let them split time in goal during shooting drills at the end of that practice and again during the warmups before the game. Both, at practice, and during the warmups, I reminded them of these three things.

Continue reading

Soccer Kids Battling for Ball

3 Tips On How To Stay True to the “It’s About Development, Not Winning” Philosophy On Gameday

They just scored to take a 1-0 lead late in the second half. I know exactly why they scored, I saw it coming before they scored, and I know that they are likely going to continue to threaten our goal for the next 5 minutes for the same reason. I refuse to fix the issue the easy way. Two minutes later the score is 2-0. My players’ fighting spirit has been broken. A minute later it is 3-0, and 2 minutes after that the game is over. We got blown out by a team we are equal to in every aspect of the game. What a great teaching opportunity.

This is the exact scenario I faced recently with my U-9 boys team. Even before we went down 1-0 I could see that one of my less athletic players was mismatched against a player who was not lacking in any aspect of the game. Sitting on the bench at that moment I had one player capable of stopping this future Messi, and playing in one of the wide positions already on the field I had another equally capable player. But it was my less athletic player’s turn to play in that position.

Continue reading

Dribbling And Control

Week 1 Soccer Practice Drills for U10, U11 & U12 Teams

Dribbling, control, and shooting


Setup


  • Each player should have a ball
  • Set cones down to make a 60×50 steps field for 18 players
    • If you have more players, make the field larger
    • Anything can be a cone (an article of clothing, a water bottle, any marker)
  • Set cones every 10 steps on the perimeter to allow players to see where the boundaries are
  • Do not set up any goals
  • Demonstrate each drill / game before starting it

Continue reading

Dribbling And Control

Week 1 Soccer Practice Drills for U4, U5 & U6 Teams

Dribbling and control


Setup


  • Each player should have a ball
  • Set cones down to make a 40×30 steps field for 10 players
    • If you have more players, make the field larger
    • Anything can be a cone (an article of clothing, a water bottle, any marker)
  • Set cones every 10 steps on the perimeter to allow players to see where the boundaries are
  • Do not set up any goals
  • There will be no challenge from another player or coach for the entirety of the practice
  • Demonstrate each drill / game before starting it

Continue reading

Dribbling And Control

Week 1 Soccer Practice Drills for U7, U8 & U9 Teams

Dribbling, control, and shooting


Setup


  • Each player should have a ball
  • Set cones down to make a 50×40 steps field for 12 players
    • If you have more players, make the field larger
    • Anything can be a cone (an article of clothing, a water bottle, any marker)
  • Set cones every 10 steps on the perimeter to allow players to see where the boundaries are
  • Do not set up any goals
  • Demonstrate each drill / game before starting it

Continue reading

Soccer Equipment Cleats and Ball

All The Equipment You Need for Soccer Practice

When it comes to practice gear for young soccer teams, there are many choices. Your league may provide you with some of the items you need, but we’ve put together a list of the most commonly used items by coaches so you don’t have to spend tons of time researching. Buy the items we list, or use them as a jumping off point to find similar items.

You can use the US Youth Soccer guide showing recommended Goal, Field, Ball sizes and match durations for various age groups to pick the correct ball size for your team.

http://www.usyouthsoccer.org/coaches/goalsizes/


Continue reading